
.jpg?w=3000&h=600)
PART 1: Electric Pruning Shears Maintenance
Electric pruning shears require precision care to maintain clean cutting performance and protect the internal mechanism from debris and sap buildup.
1. Deep Cleaning After Every Use
Regular cleaning prevents sap hardening and internal blockage.
Step-by-step:
- Turn off the tool and remove the battery
- Unscrew and remove the blade cover plate
- This allows access to internal gaps where fine wood chips may enter
- Use a soft brush to remove debris from:
- Blade surface
- Joint area
- Internal cavity
- Wipe sap using a cloth lightly dampened with alcohol
- Dry all components completely
- Reinstall the cover plate securely
Important: Internal debris buildup is one of the main causes of reduced cutting smoothness and blade resistance.
2. Blade Lubrication
Proper lubrication reduces friction and extends blade lifespan.
Steps:
- Apply 2–3 drops of lubricating oil on the blade and pivot point
- Activate the tool and open/close the blade 2–3 times
- Wipe off excess oil
Frequency: After every use
Watch our video to see how to lubricate the blade
3. Blade Sharpening (Precision Method)
Electric pruning shears require fine sharpening to maintain cutting accuracy.
Recommended tools:
- Fine whetstone (800–1200 grit)
- Diamond sharpening stone
Step-by-step:
- Clean blade before sharpening
- Identify the beveled cutting edge
- Hold the stone at a 20°–25° angle
- Stroke in one direction along the cutting edge
- Repeat 5–10 times evenly
- Lightly remove burr from the flat side (1–2 strokes only)
- Wipe clean and apply light oil
Key rule: Maintain the original factory angle at all times.
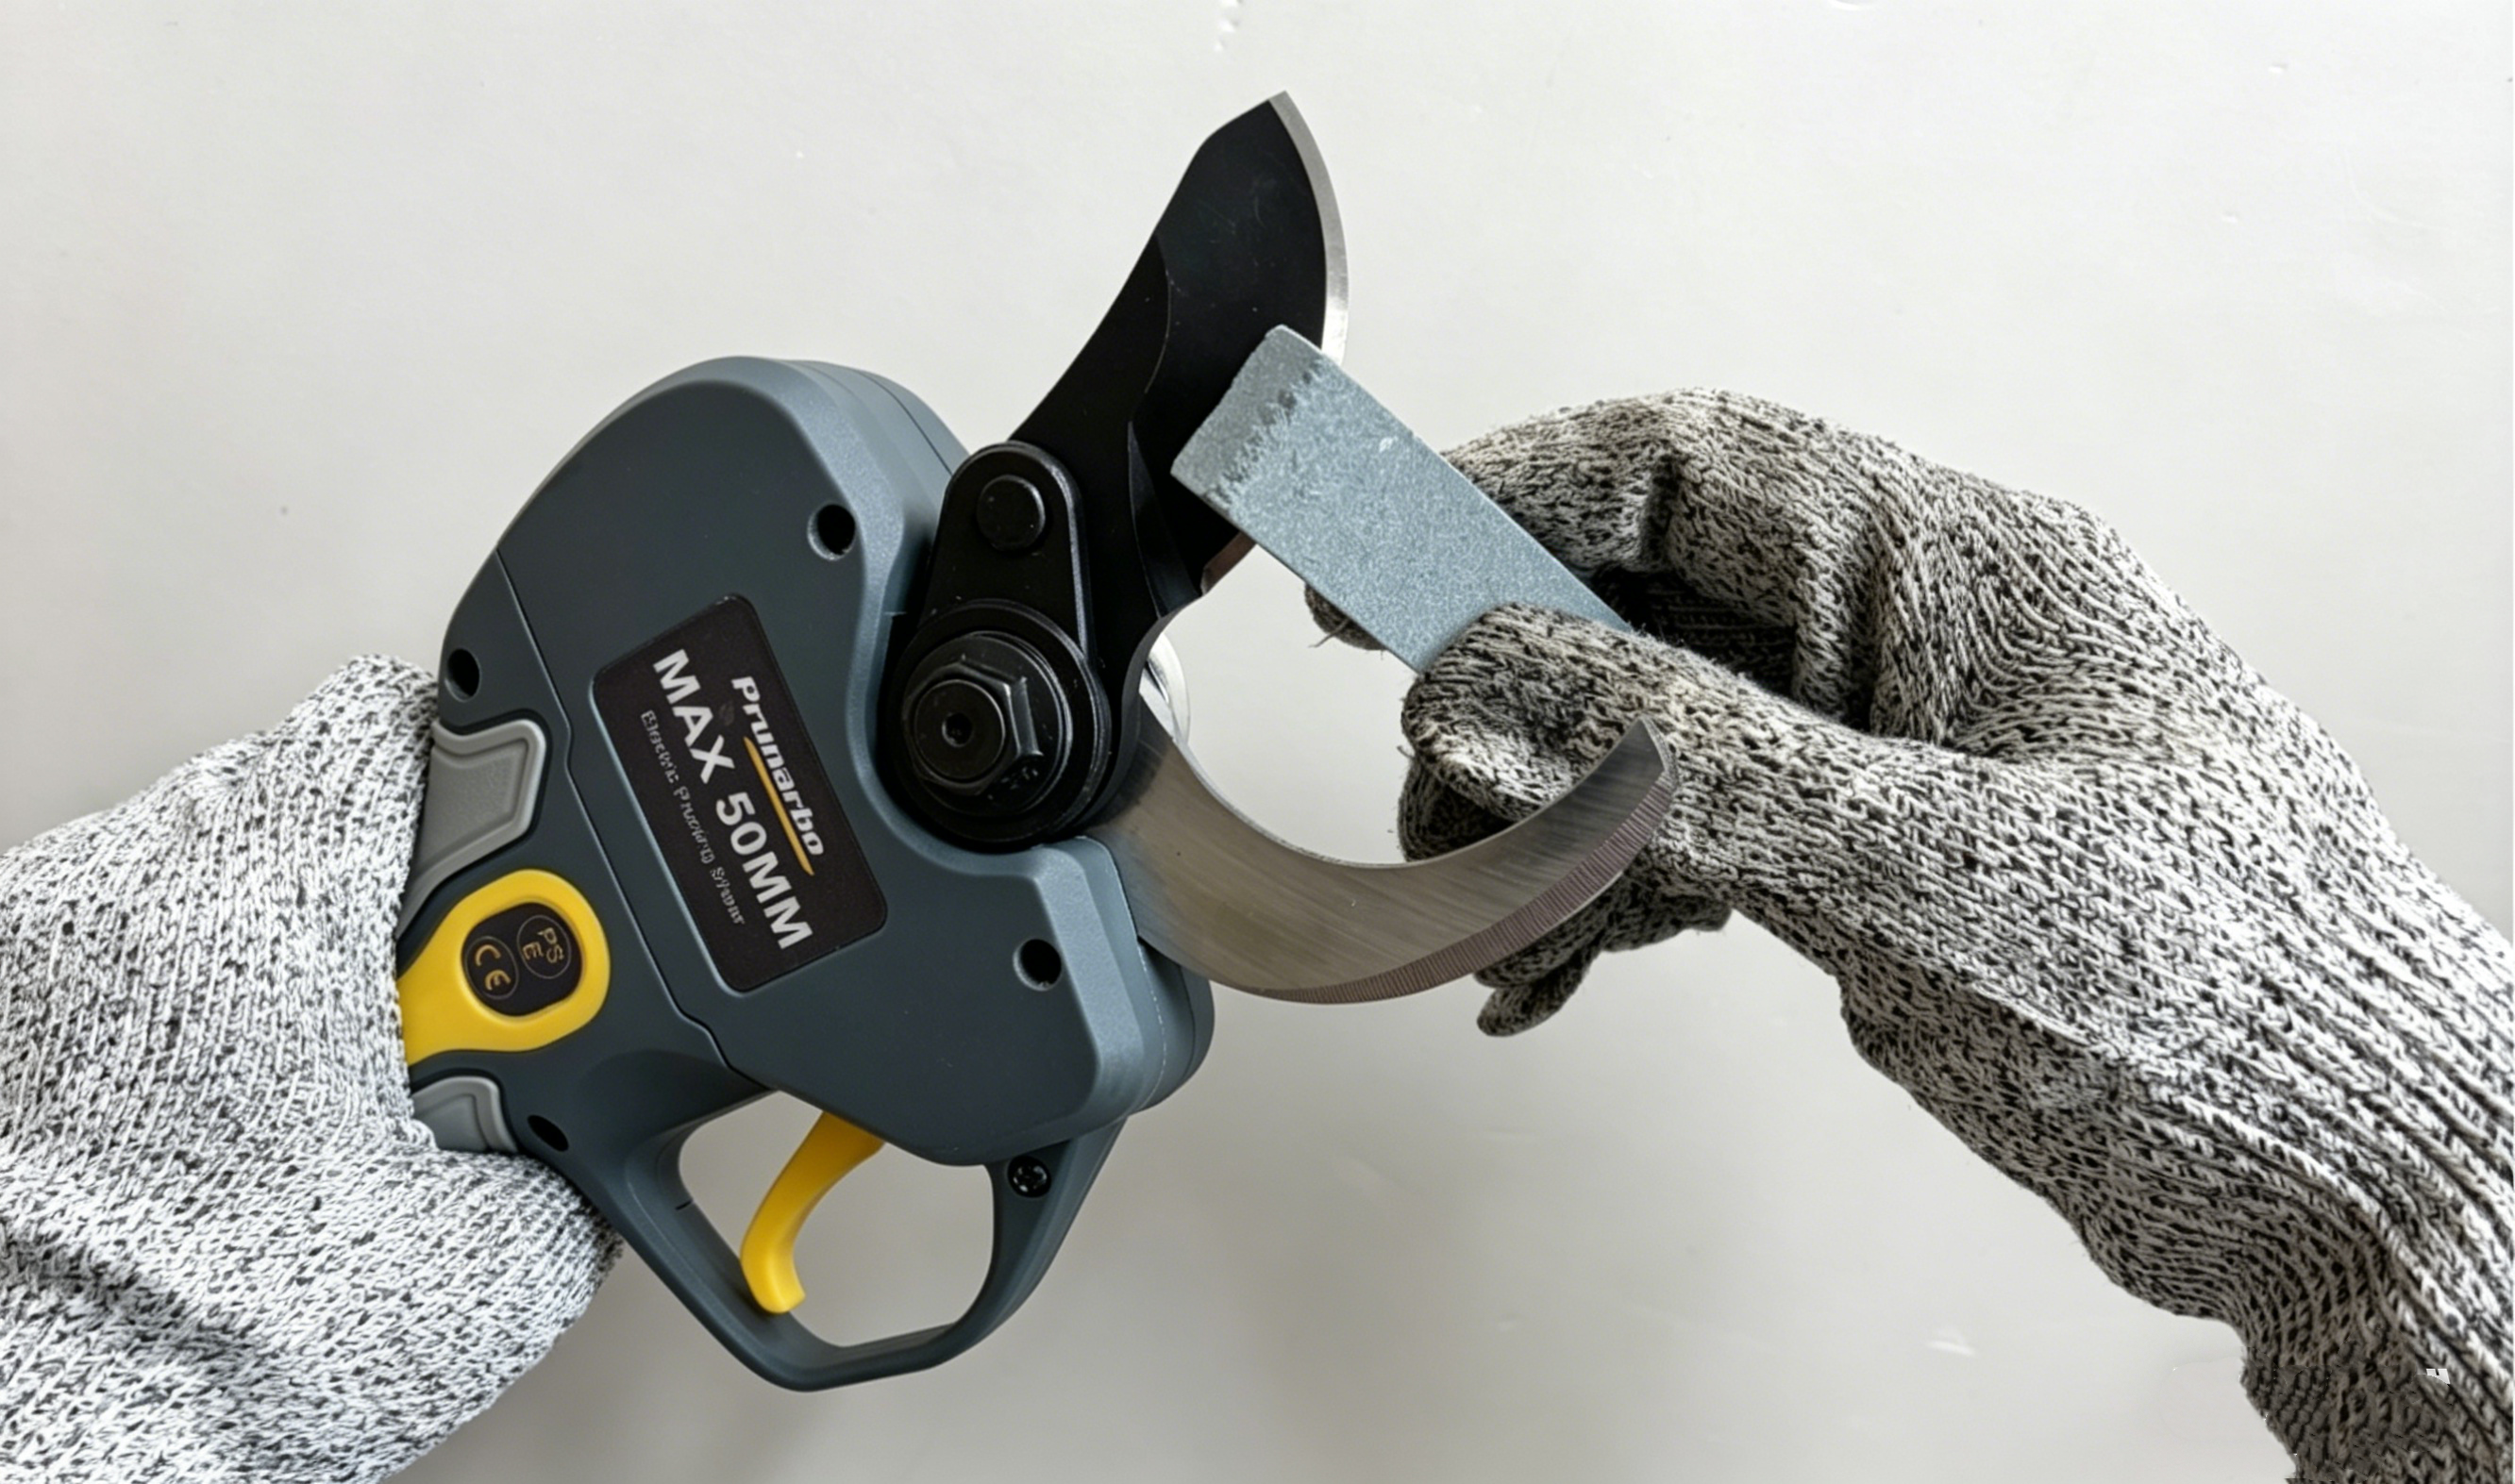
If the blade is chipped, heavily worn, or no longer holds an edge after sharpening, it may be time to replace it.
You can find compatible replacement blades here:
4. Routine Inspection
- Check blade alignment
- Inspect screws and tightness
- Look for cracks or wear
Frequency: Every 2–4 weeks
Worn or damaged blades can affect cutting efficiency and should be replaced when necessary.
PART 2: Electric Chainsaw Maintenance
Chainsaws operate under higher load conditions and require consistent chain care, lubrication, and tension control.
1. Cleaning After Each Use
Sawdust buildup affects performance and oil flow.
Steps:
- Remove battery
- Open side cover
- Remove sawdust from:
- Chain
- Guide bar
- Sprocket area
- Clean oil outlet hole
- Reassemble after cleaning
Watch our video to see how to clean the chainsaw
2. Chain Lubrication
Proper oiling prevents overheating and chain wear.
Steps:
- Fill with bar and chain oil
- Run saw briefly to distribute oil
- Confirm oil is reaching chain surface
If the chain appears dry during use, stop immediately and refill.
3. Chain Tension Adjustment
Correct tension ensures safe and stable cutting.
Steps:
- Slightly loosen guide bar nuts
- Adjust tension screw clockwise
- Lift chain to check movement
Correct tension standard:
- Chain lifts approximately 3–5 mm from the bar
- Chain returns smoothly when released
- Chain moves freely by hand (with gloves)
Too loose increases the risk of derailment.
Too tight increases motor load and wear.
A worn or stretched chain may not maintain proper tension and should be replaced for safe operation.
Check compatible replacement chains and guide bars here:
Replacement chains for PR-E8 chainsaw
Replacement guide bar for PR-E8 chainsaw
4. Chain Sharpening (PR-E8 Specification)
The PR-E8 chainsaw uses a 2–3 mm round file for optimal sharpening performance.
Recommended tools:
- Round file: 2–3 mm (PR-E8 compatible size)
- File guide (optional for angle consistency)
Step-by-step:
- Secure chainsaw firmly
- Identify cutting tooth direction
- Position the file at a 25°–30° angle
- File each tooth from inside to outside
- Apply 3–5 consistent strokes per tooth
- Sharpen all teeth on one side first, then switch sides
- Ensure uniform sharpening across all teeth
Key rule: Keep stroke count and angle consistent for every tooth.
If the chain becomes uneven, excessively worn, or difficult to sharpen consistently, replacing it is recommended.
Browse compatible replacement chains or guide bars for PR-E8 here:
Replacement chains for PR-E8 chainsaw
Replacement guide bar for PR-E8 chainsaw
5. Routine Inspection
- Check chain wear
- Inspect guide bar condition
- Verify oil flow
Frequency: Every few uses
PART 3: Maintenance Schedule Overview
| Task | Electric Pruning Shears | Chainsaw |
|---|---|---|
| Cleaning | After every use | After every use |
| Lubrication | After every use | During every use |
| Sharpening | Every 2–4 weeks | Every few uses |
| Inspection | Monthly | Monthly |
Professional Maintenance Tips
- Always remove the battery before maintenance
- Never operate tools with loose components
- Store tools in a dry environment
- Clean immediately after heavy-duty use
Final Thoughts
Regular maintenance ensures your tools stay powerful, safe, and efficient for years. Clean cuts improve both work efficiency and plant health.
If performance drops despite proper maintenance, replacing worn parts such as blades or chains can help restore optimal cutting performance.