
The Most Important Part of Pruning Happens Before You Cut
You have identified a branch that needs to go. Your pruning shears are sharp, and you're ready to make the cut.
But where exactly should you cut?
Cut too far away, and you may leave a stub. Cut too close to the trunk, and you can damage the tree's natural protective tissues. Choose the wrong point on a larger branch, and you may cause the bark to tear as the branch comes free.
Good pruning isn't just about making a clean cut. It's about placing that cut in the right location.
Trees don't heal wounds in the same way people do. Instead, they respond to injuries by compartmentalizing damaged tissues and gradually growing new tissue around the wound. Correct pruning helps preserve the structures that support this process.
Let's look at how to identify the right cutting point and avoid the mistakes that can cause unnecessary damage.
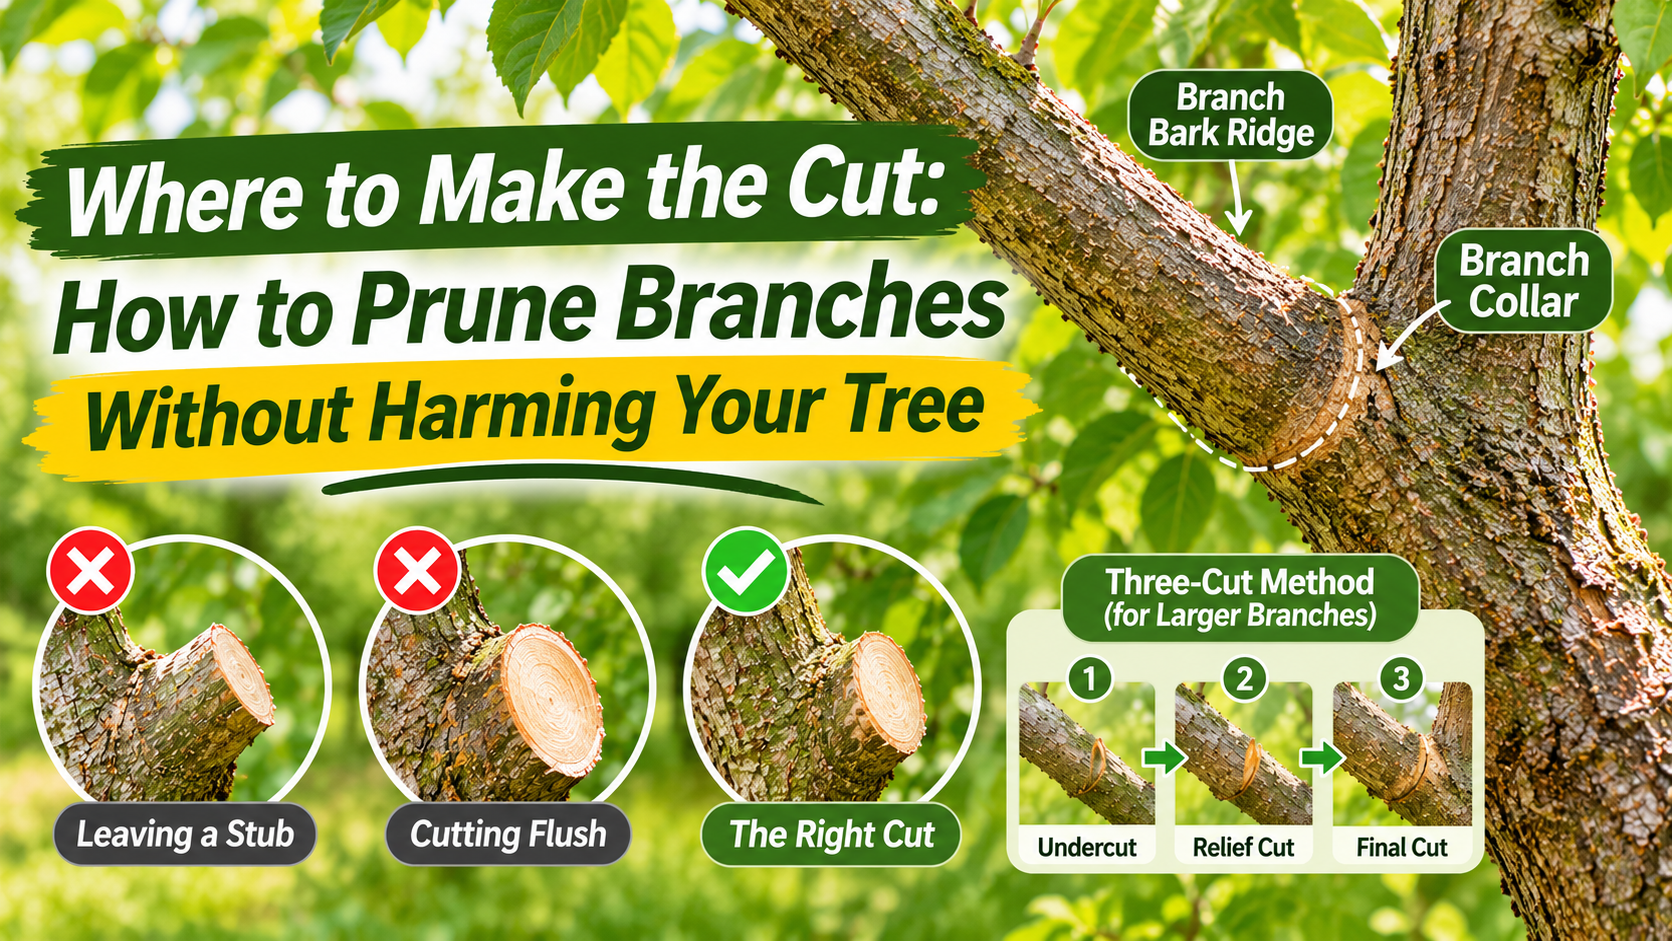
1. Learn to Identify the Branch Collar
The branch collar is one of the most important features to recognize before removing a tree branch.
The branch collar is the slightly swollen area where a branch joins the trunk or a larger parent branch. It may look like a raised ring or bulge around the branch base.
This area contains important protective tissues that help the tree compartmentalize decay following branch removal.
When removing a whole branch, the goal is to cut just outside the branch collar, preserving the collar rather than cutting through it.
What if the collar is difficult to see?
Not every branch has an obvious swollen collar. On some species or branch unions, the transition is subtle.
Look for the change in bark contour around the base of the branch. Avoid cutting directly into the trunk or parent branch in an attempt to create a perfectly smooth surface.
The correct cut may leave a small, natural contour at the branch base. That's preferable to removing the collar with a flush cut.
2. Find the Branch Bark Ridge
The branch bark ridge is another useful landmark, especially when examining the upper side of a branch union.
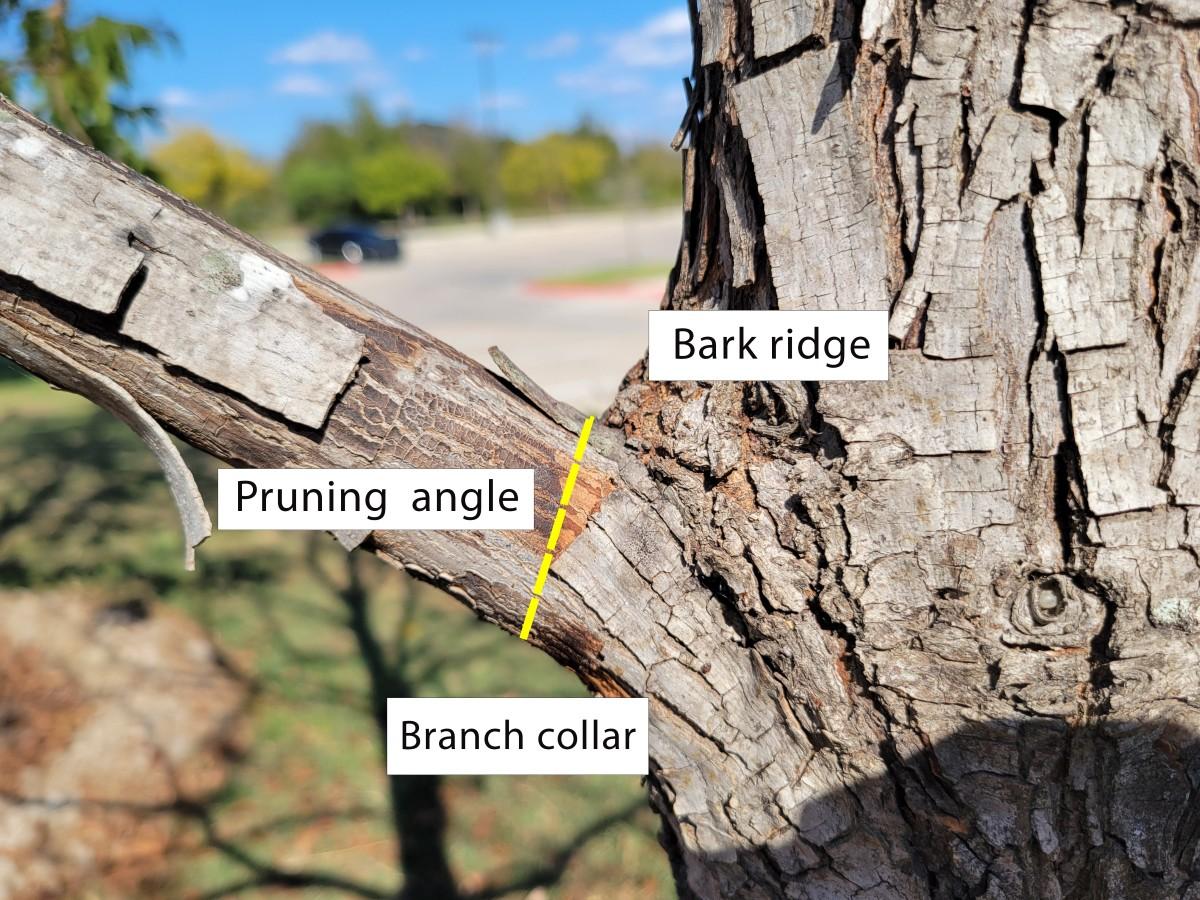
It is a raised line of bark that forms where the bark of the branch meets the bark of the parent stem. Depending on the branch angle and species, it may be easier or harder to see.
Together, the branch bark ridge and branch collar help you understand the natural shape of the branch union.
When removing a branch, make your cut just outside the collar, following the union's natural contours. Don't simply cut straight across the trunk or use an arbitrary distance from the branch base.
Remember: The branch collar is the key landmark for the final removal cut. The branch bark ridge helps you read the upper side of the union; it is not a separate target that you should cut through.
3. Avoid Two Common Cutting Mistakes
Two mistakes are particularly worth avoiding when removing a whole branch.
Mistake 1: Leaving a long stub
A cut made too far from the branch collar leaves a section of branch behind. That stub may die back and can interfere with the tree's ability to close over the wound effectively.
Better approach: Locate the branch collar before cutting and remove the branch just beyond it.
Mistake 2: Cutting flush against the trunk
A flush cut removes the branch collar and can damage the tree's protective tissues. A smooth-looking surface is not necessarily a better pruning cut.
Better approach: Preserve the collar and follow the natural shape of the branch union.
These mistakes can be avoided by identifying the correct cutting point before operating the tool.
4. How to Remove a Larger Branch Without Tearing the Bark
Small branches can often be removed with a single well-positioned cut. Larger, heavier branches are different.
As a branch begins to separate, its weight can pull the bark downward, tearing it beyond the intended cut. This is especially problematic when the branch is attached to a trunk or major limb.
For suitable branches that are within your ability to handle safely, a three-cut method can help prevent this.

Step 1: Make an undercut
Make a small cut from the underside of the branch, a short distance away from the trunk or parent branch.
This initial cut helps stop the bark from tearing down the branch toward the trunk.
Step 2: Make the relief cut farther out
Cut from the top of the branch, slightly farther toward the branch tip than the undercut.
The outer portion of the branch can then break free without pulling bark away from the trunk.
Step 3: Make the final removal cut
With the branch's weight removed, make the final cut just outside the branch collar.
Keep the collar intact and avoid leaving a long stub.
The first two cuts are relief cuts; they are not intended to be the final cuts at the branch union. The last cut establishes the correct pruning location.
Important safety note: This technique is not a reason to attempt every large branch yourself. Heavy limbs, branches under tension, overhead work, and branches near buildings or power lines can be dangerous. Leave those jobs to a qualified arborist.
5. Not Every Cut Should Remove an Entire Branch
Sometimes the goal is to shorten a branch rather than remove it completely. In that situation, the correct cutting point is different.
There are two useful concepts to understand.
Reduction cut
Shorten a branch back to a suitable lateral branch that can take over its continued growth. The lateral should be large enough relative to the branch being shortened; a common guideline is at least about one-third of its diameter.
Heading cut to a bud
When shortening a small shoot, cut just above a suitable bud, often one facing the direction you want new growth to develop. Avoid cutting too close to the bud or leaving a long stub.
This is different from cutting an established branch arbitrarily between growth points.
The distinction matters because different cuts produce different growth responses. An arbitrary cut that leaves a stub can encourage vigorous shoots near the cut and may create a poorly managed wound.
6. Do You Need to Seal the Cut?
Many gardeners assume that every pruning wound should be covered with a sealant, paint, or dressing.
In general, routine pruning cuts on trees do not need wound paint or sealant. These products don't reliably prevent decay and may interfere with the tree's natural response.
The more important steps are to make the cut correctly, avoid unnecessary injuries, and use clean, sharp tools. If you're dealing with a specific tree disease or a specialized horticultural situation, follow locally appropriate professional guidance.
7. Choose a Tool That Matches the Branch
Even when you know exactly where to cut, the wrong tool can make the job unnecessarily difficult.
-
Small, tender shoots: Hand pruners are usually suitable.
-
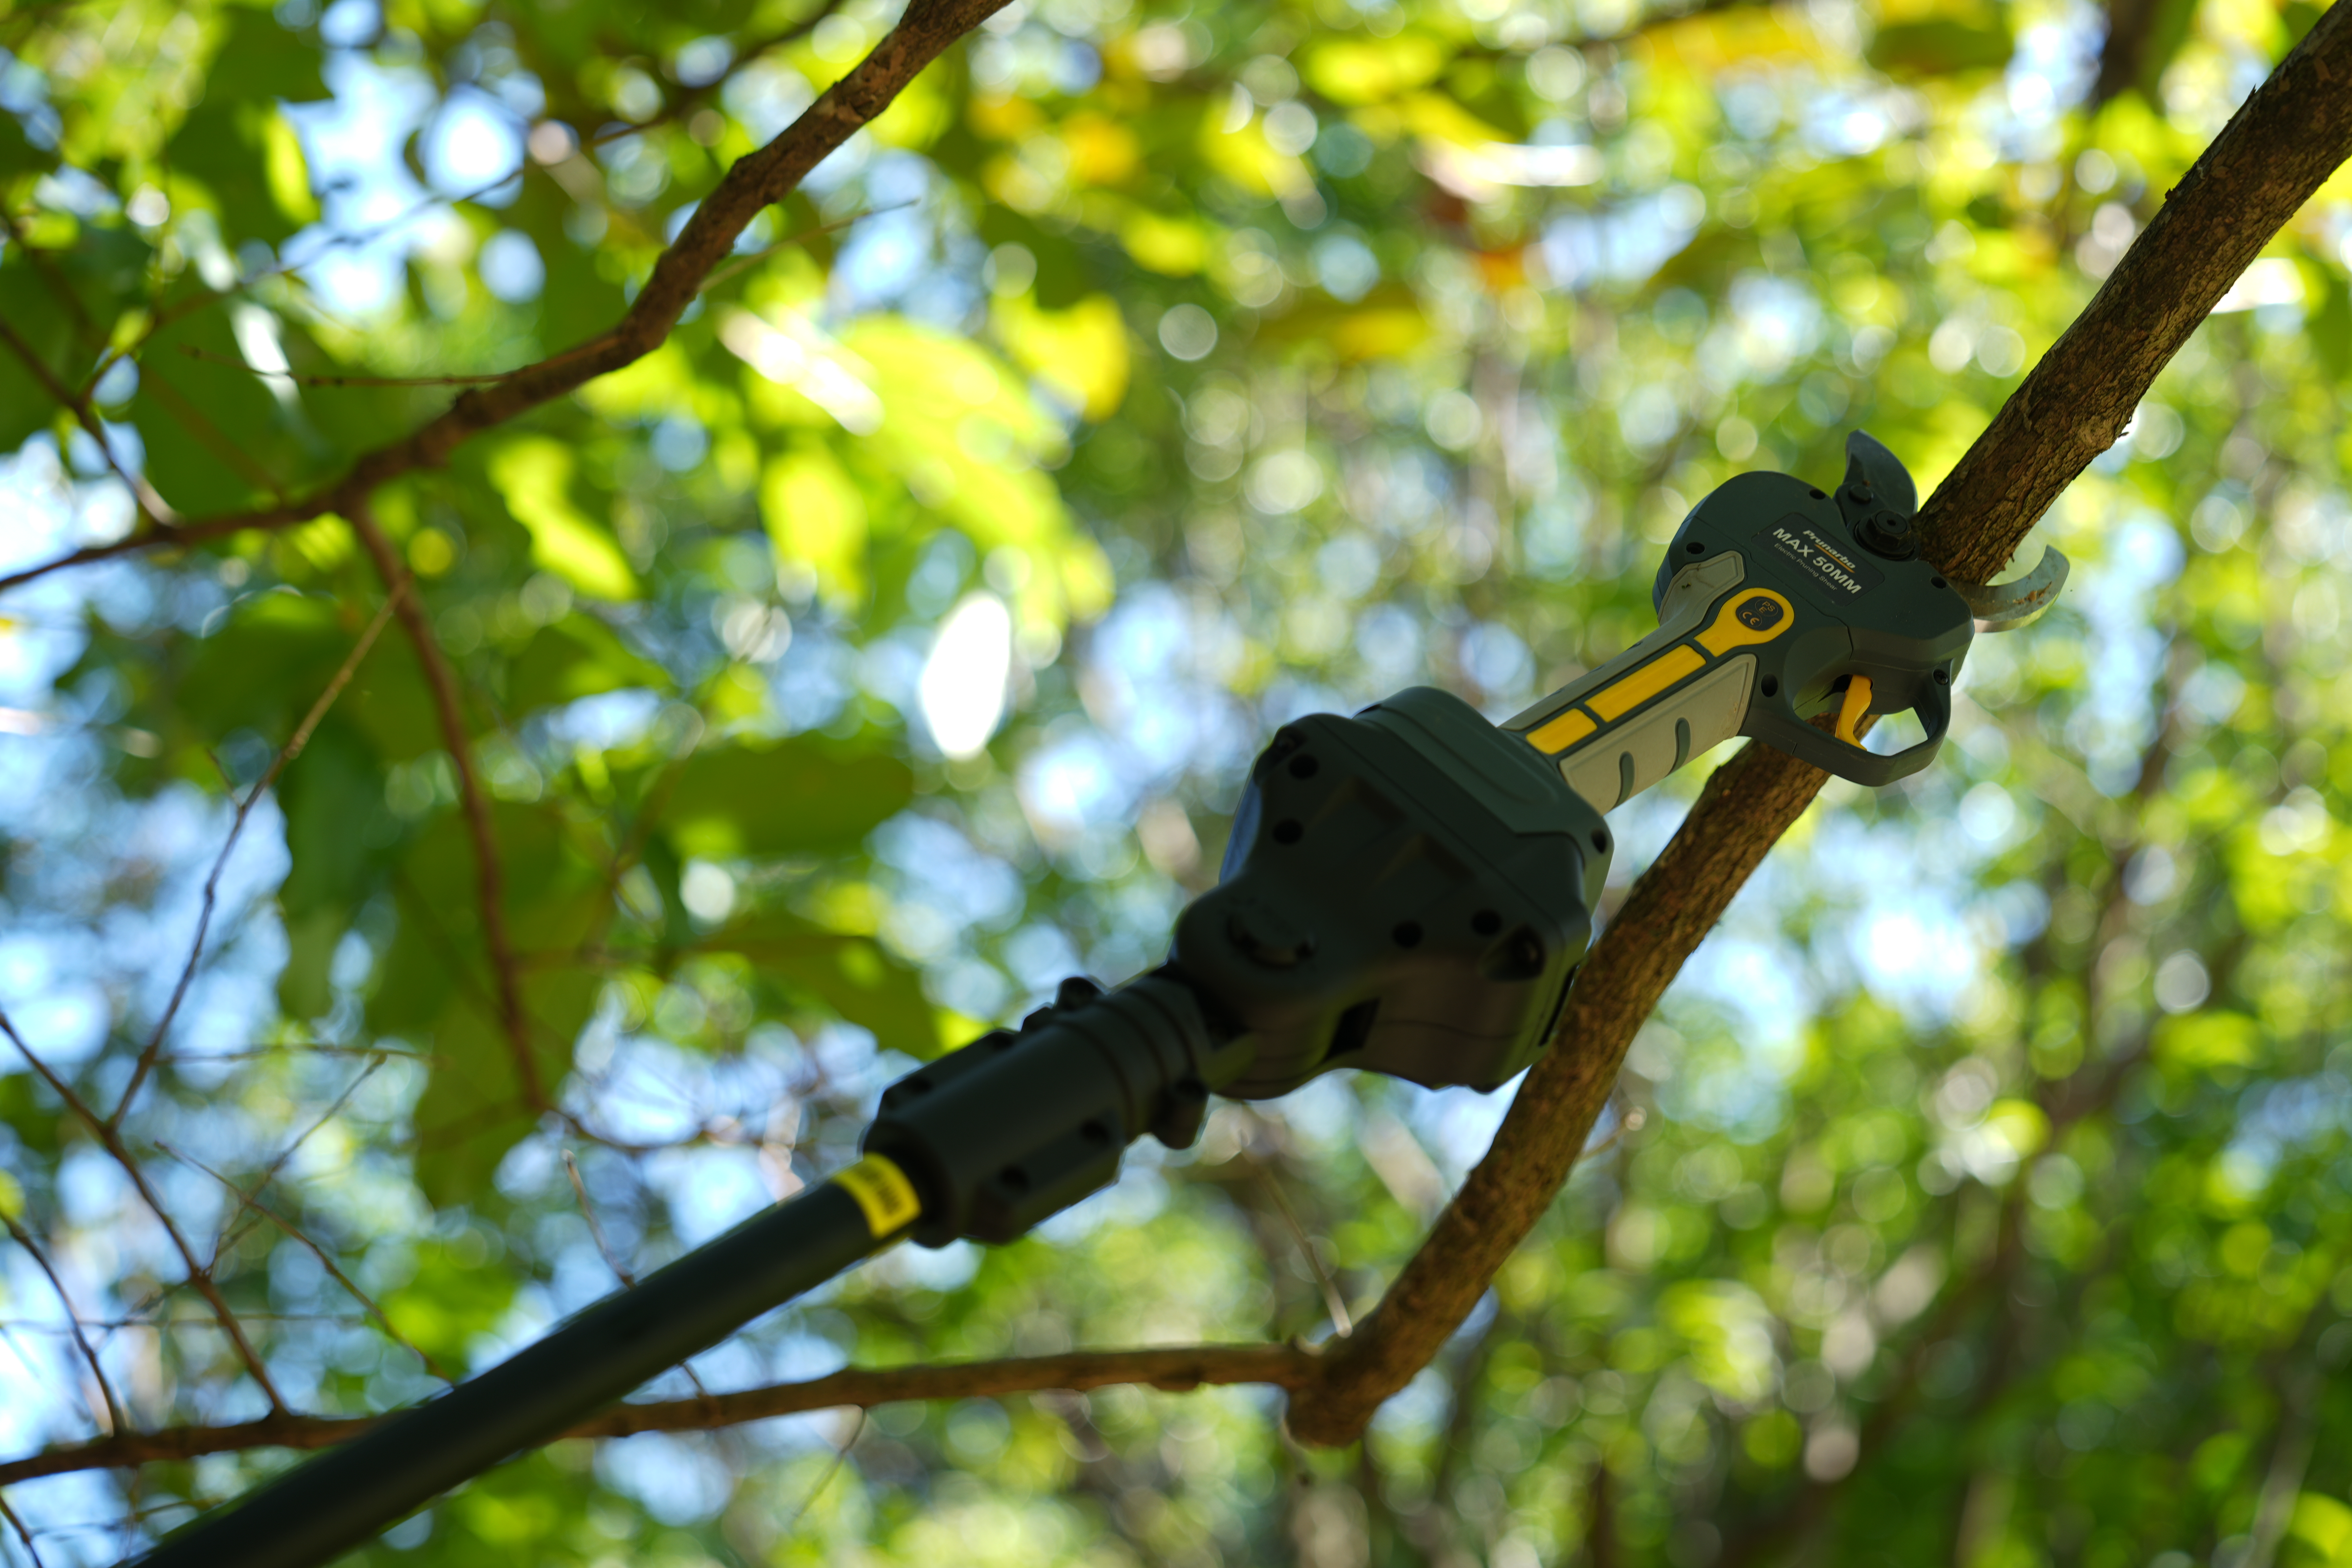
Branches within the tool's rated capacity: Electric pruning shears may reduce repetitive hand effort and help you work efficiently.
-
Thicker branches: Use an appropriately rated lopper or pruning saw when suitable.
-
Large, elevated, or hazardous limbs: Hire a qualified arborist.
Never force pruning shears beyond their rated cutting capacity. If a branch is too thick or hard for the tool, stop and switch to a suitable method.
Prunarbo offers electric pruning tools for different cutting tasks. Choosing the right tool helps you make controlled cuts without treating every branch as the same job.
Explore Prunarbo Pruning Tools →
Before You Make the Cut: A Quick Checklist
Before removing a branch, check these five things:
-
Purpose: Why does this branch need to be removed or shortened?
-
Position: Have you identified the branch collar or a suitable lateral branch?
-
Weight: Can you remove it safely without tearing bark or losing control of the branch?
-
Tool: Is your pruning tool suitable for the branch's diameter and condition?
-
Final result: Will the cut preserve the tree's natural structure without leaving a stub?
If you're uncertain about a major branch or a structural problem, seek professional advice before cutting.
Better Cuts Start With Better Decisions
Pruning doesn't have to mean cutting branches as close to the trunk as possible or making every cut look perfectly flush.
It means understanding how a branch connects to the tree, identifying the right cutting point, and choosing a technique that minimizes unnecessary damage.
Preserve the branch collar when removing a whole branch. Use an appropriate lateral when shortening a larger limb. And when a branch is too large or dangerous to handle safely, leave it to a professional.
A better cut starts before the tool touches the branch.
With the right knowledge and the right tool for the job, you can approach your next pruning task with greater confidence.
Prune smarter with Prunarbo.